Monday, July 28, 2014

Fresh Coconut Lemon Custard Sponge Cake

Today is my mother in law's birthday and I'm always puzzled what kind of cake to make in the middle of summer. While this summer isn't a scorcher (so happy about that) it is still summer and I'm thinking light foods, not heavy. Plus, I like to make cakes that pair well with dinner. For her birthday I'm making grilled lime salmon with coconut crisps and mango avocado salad. What better than a coconut lemon cake to go with it? Plus, she's had this cake before and really loved it.


This is one of the few recipes I designed myself. Like most recipes, its base is similar to other recipes, but I tweaked it to make it my own.  When I made it and it turned out the first time I wrote the recipe down on a scratch piece of paper. I've made it since and added notes on the sides, arrows pointing here and there, so last night I decided to type it up and put it in my recipes digitally.

Fresh Coconut and Lemon Sponge Cake

Most cakes in Europe are made without the aid of baking powder. They use eggs for leavening instead. For Americans this is akin to a sponge cake  - very light and fluffy. European cakes also, typically, use a custard for filling and icing,  not the butter/sugar frosting that most Americans are used to eating. Because of the custard filling/icing, it must be refrigerated until served.

Fresh coconut makes this cake. You will not get the same flavor or texture if using pre-packaged sweetened coconut or desiccated coconut. You want to wow? USE FRESH COCONUT!

This is my recipe and since I hate wasting ingredients, I made sure I used everything up! A full can of coconut milk, a full dozen eggs - whites and yolks, the zest and juice of lemons, and even the full coconut, including the water!

Ingredients:
  • Shredded and Toasted Coconut:
  • 1 Large coconut where we will use:
              Flesh of coconut
              Water of coconut
  • 2 tablespoons granulated sugar
Custard:
  • 4 whole eggs
  • 1/2 cup granulated sugar
  • 1 can of coconut milk (12 ozs.)
  • juice of two lemons (keep zest for sponge)
  • 2 heaping tablespoons of cake flour (perhaps slightly less)
  • 1/2 cup grated toasted coconut (see above)
  • 2 sticks unsalted butter (room temperature)
Sponge:
  • 8 eggs (separated)
  • 1/2 cup granulated sugar
  • scant 1/2 cup cake flour
  • zest of two lemons (reserved from lemons used for custard)
*optional, decorate with raspberries along the bottom perimeter.

How to prepare the coconut:

When buying a coconut, lift the coconut and give it a good shake; there should be plenty of liquid sloshing around inside. (Note that the liquid isn’t coconut milk; it’s coconut water. Coconut milk is made by blending water with the meat.) Also make sure there is no mold on the outside, where the eyes are. I usually buy coconuts in an international market as they tend not to sit around as long as they do in traditional grocery stores. Who wants a moldy, rotting coconut?

To drain the coconut, take a phillips screwdriver and with a hammer, poke through the 3 eyes on top. Drain and reserve the coconut water. (Photos show two coconuts as I am using more coconut for a dinner dish. You only need one for this cake recipe.)


See the drain holes at the top?

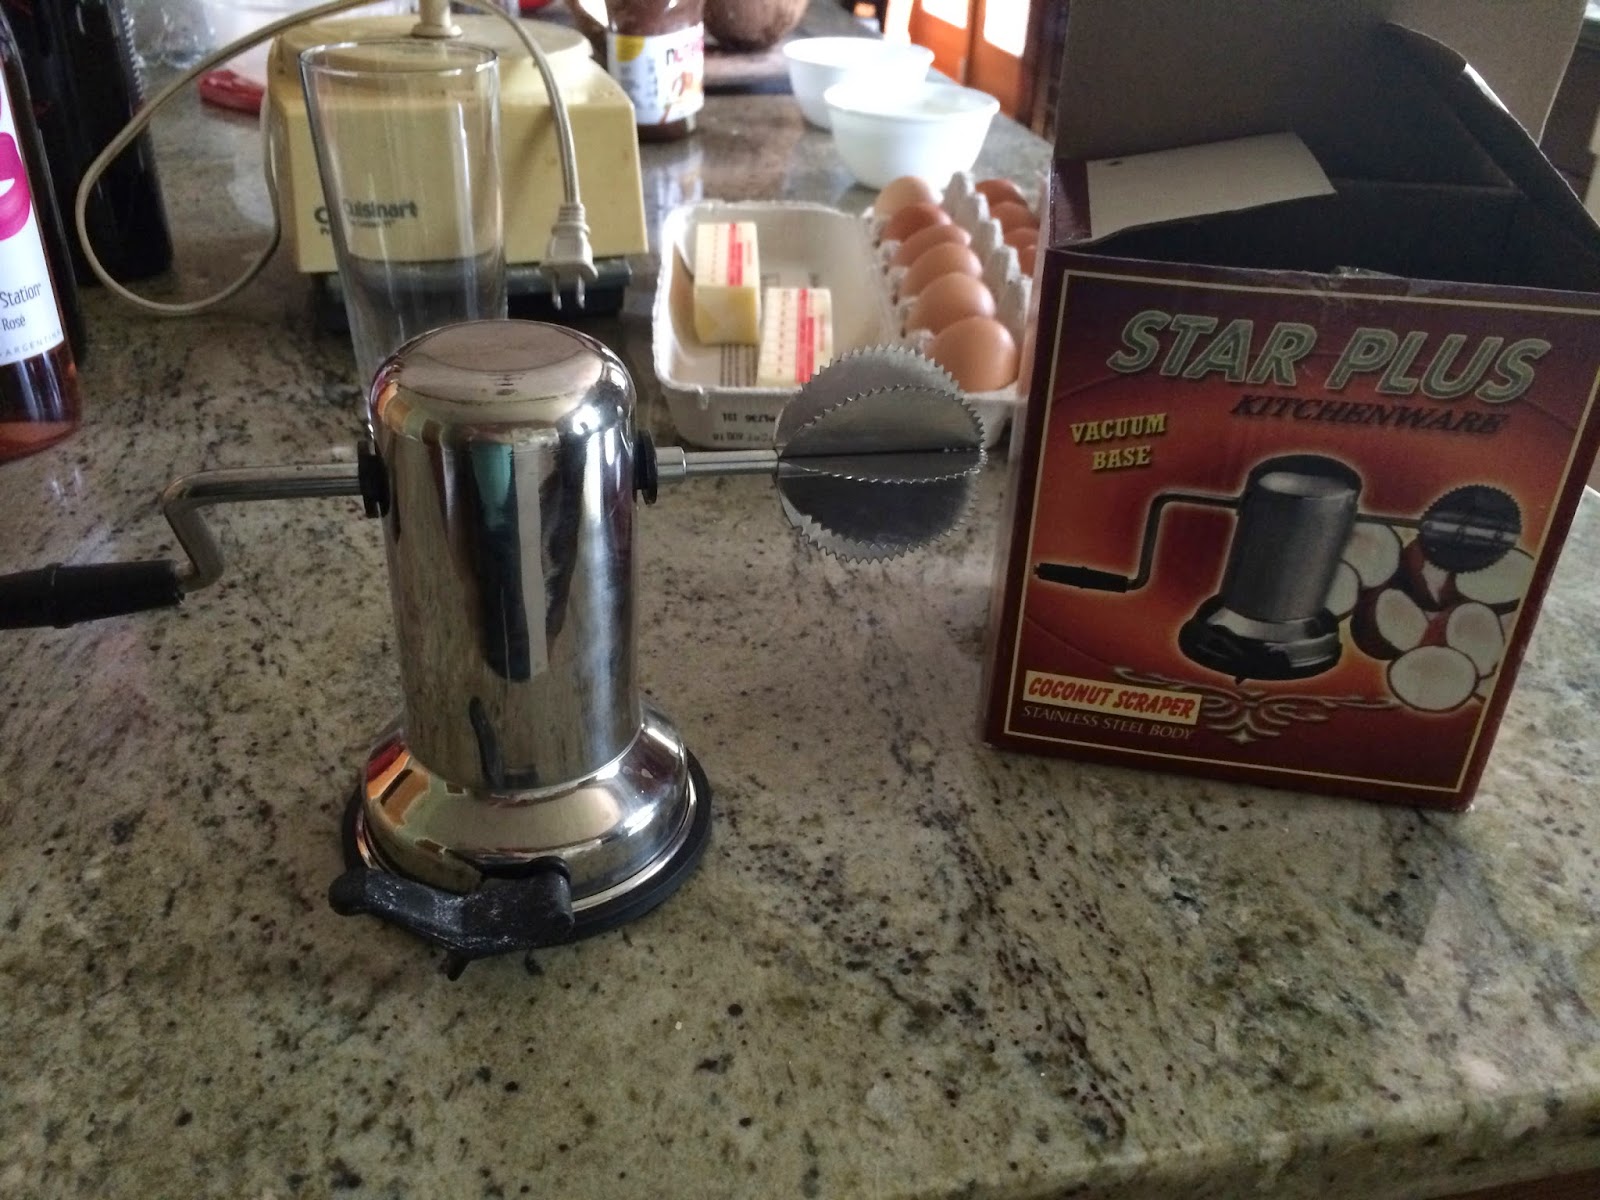
To crack open the coconut,  (I do this outside on the sidewalk) place the coconut on a towel and pound with a hammer along the perimeter of the coconut, turning it around and around between strikes until it breaks in half. Grate with a coconut grater if you have one.

 It grates very finely though and might not be what everyone likes aesthetically. I found it for under $20 at a small international market.


 When using a coconut grater versus peeling the coconut, be very careful not to start shredding the peel. No one wants unsightly flecks of brown in their coconut.


If you don't have a coconut grater, no problem. Put the coconut halves on a rack in a preheated 400ºF (200ºC) for 20 minutes, which will help separate the meat from the shell. When the coconut halves are cool, use a flat-head screwdriver wedged in between the meat and shell to pry them apart. Take a vegetable peeler and remove the skin of the meat, then grate or grind the coconut meat, as you wish with a vegetable peeler to make thin strips, or grate the coconut with a metal grater into shreds. I've done this method too and it works fine once you actually pry the coconut out of the hard shell.

 To toast the coconut, in a large pan pour the coconut water and add the sugar. Heat and stir until the sugar is dissolved. Add the grated coconut and cook down the liquids over high heat.  The picture below shows the coconut with the water mostly evaporated.


When most of the liquid has evaporated, turn down the heat to medium for toasting. Toast until it just starts to turn brown. Turn off the heat and continue stirring as it finishes toasting in the hot pan.  Measure out 1/2 cup for the custard. Reserve the rest for covering the cake.


How to prepare the custard:

In a mixing bowl beat the whole eggs until well mixed. Add the sugar, cake flour, and lemon juice (grate the lemon first to get the zest for the sponge, then squeeze it for juice for the custard),  and place over a double boiler, add the coconut. Heat and stir constantly until it thickens; until it reaches the consistency of  pudding. Don't worry if it sort of looks lumpy as it thickens, this is normal. Once it has thichened, emove from the heat and cool in the refrigerator. You can do this a day ahead if you prefer.

When completely cool, thoroughly beat in the room temperature butter. It’s now ready to use to fill and ice the cake. Do not chill after adding the butter until you have filled and iced the cake  as it will be too firm to spread if you do.


How to prepare the sponge:

Preheat the oven to 350 degrees. Grease and flour two 8” round cake pans.

Separate eggs into 2 separate mixing bowls; whites in one, yolks in the other. Add 1/4 cup sugar to the egg whites and then beat until stiff peaks.


In the 2nd mixing bowl, add 1/4 cup sugar and lemon zest to the egg yolks and beat until light in color and fluffy.


Add the beaten egg whites and cake flour to the egg yolk mixture and combine carefully. Mix until just combined. You want to keep as much of the air bubbles in the batter as possible.


Divide batter between the two cake pans.


Bake until golden or until an inserted toothpick comes out clean. (This is much quicker than standard cake. Check in 15 minutes.)

Let cool in the pans. It will shrink/shrivel. Don't be alarmed. It's supposed to do that. The photo below is just from the oven. It shrank about a third after cooling.


Assemble the cake:

Cut each of the cake layers in half to create a total of four cake layers. First, on your cake plate, put a small dollop of filling on the bottom. Put the first layer on the cake plate over the dollop of filling. This will hold your cake in place to prevent slipping while you assemble the rest of the cake. Spread the top layer with custard.  It is OK if the filling spills from the sides as you will be icing it with the same filling.


Repeat with the three remaining layers. Reserve enough custard to ice the sides of the cake.  See how it's not all pretty and even? That's OK. Sponge cake does not behave as prettily as traditional cake, but with with some smoothing of cream and adding of coconut, it will look great in the end.


Use the remaining filling to ice the outside of the cake. Don't worry about crumbs or getting it absolutely smooth.  Nothing will show through the coconut topping.


After the cake is assembled and iced, do not chill it yet. Sprinkle the reserved toasted coconut over the cake and try to catch the sides. A lot will drop off the sides onto a plate,. Use a small decorating spatula to help lift it and press it in place.

All of that fallen coconut you see in the above picture has been carefully lifted up and lightly pressed into the side of the cakes. Press evenly around the cake to make a smooth surface to finish.


Clean up extra coconut off the serving plate with a damp paper towel. For decoration and complimentary flavor, decorate the bottom perimeter of the cake with fresh (washed and dried) raspberries.

To cover, stick toothpicks around the top around the perimeter and one in the center. Then lightly wrap it in cling wrap. and chill the cake overnight.


To serve, remove from the refrigerator 30 minutes before serving, unwrap it and remove the toothpicks. Holes won't be visible because of the shredded coconut.

Enjoy!

Monday, January 21, 2013

A tip on avoiding over proofing your rising dough

One thing I used to do and I guess it's a common newbie bread maker's mistake is to over proof the dough - or in layman's terms: to let it rise too long.

Of course, you can't know that while it's happening, but you find out eventually when your dough doesn't grow when it's in the oven and you end up with a variation of a brick.

One of the best ways to avoid over proofing is to put your dough in a smaller container. My mixer is a big 8 quart bowl. Even with making two loaves, the dough is still a smallish ball at the bottom of that container. So, doubling it or tripling it's size doesn't look a heck of a lot different, but letting it rise too long can have bad effects in the baking process.

See how small this is at the bottom of the bowl? How could I really know when it has doubled in size?


This is the same dough in a smaller mixing bowl. So, one trick is to transfer the ball of dough to a smaller mixing bowl as shown here:


Kind of hard to see in the photo, but it's about 2" from the rim in a medium sized mixing bowl. It's much easier to see if it's doubled in this medium sized bowl than in a large bowl.

Here it is, all risen and ready to punch down (not literally) and to shape.


Some bakers take it a step farther and use glass and plastic containers where they can mark the starting line and the goal line for rising. So, the dough would start at say 2 quarts and rise to 4 quarts. (I might need to get these as I could use them for fermenting yogurt too!)


It's a bit easier once you've shaped a loaf to see if you've over proofed it or not, especially when you put it in a pan, but it can be tricky as times vary greatly even for a recipe you are used to making.


Saturday, January 19, 2013

A super lazy whole grain bread from a mix


This is a dark/black bread popular in Scandinavia. You can often find smallish rye loaves of these precut super thin breads in the supermarket. They appear to be used for making dainty little sandwiches like smoked salmon. But you can also make them yourself with this great mix from Ikea. It's called Brodmix Flerkorn.


This is a case where it's cheaper to buy the mix than it is to stock all the ingredients that would go into the loaf. I wish I could remember how much I paid for this mix (makes one loaf), but I don't. I want to say 2.99? I will update the price when I buy some again at my next visit to IKEA.

This really is as easy as making pancakes from a mix. Well, easier as you have to stand, pour, watch and flip pancakes. With this bread you quite literally shake, add water, close, shake again, pour it into a greased bread pan, let it rise and then bake. No kneading, no nothing. You don't even need any dishes other than the pan to bake it in as you mix it right in the box! Seriously!

So, what is in this bread?

Here's the ingredients: Wheat flour, wheat flakes, rye flakes, course rye flour, sunflower kernels, wheat starch, linseed, malt (from barley), sourdough powder (rye flour), salt, dried yeast.

Now, I can't be 100% sure it's whole wheat flour, but I think it is. If not, it's still chock full of great stuff and provides a good source of protein and dietary fiber. Take a look at the nutritional facts.


See how easy it is to make? I just add water to the milk like carton, shake and then pour it out into the pan.  The rising time is short (45 minutes) and then you bake it for an hour.


I'm showing some pictures of it as it should look in the pan after mixing (in a greased pan).


And how much it rises in 45 minutes. It doesn't rise much.  See how it is now to the rim of the pan? That's it. It won't grow much more in the oven either. You can even see in the picture on the box, that it's not a tall bread, but that bit of rising does help in slicing it as otherwise it would be like slicing a brick.


My older son doesn't really like bread, but he likes this. It goes great with cheeses and spreads. My husband eats this as sandwich bread. He is European though and didn't grow up on Wonder Bread. It  might be a bit too nutty for sandwiches if you aren't used to it, but it's a favorite in our house. And super great for those days I'm just not up for making a detailed loaf.


Notice there are no funny ingredients in that list I typed out. It really is as if I made it myself - just cheaper which is funny to say as it's not cheap, but for me to stock up on specialty flours and powders and flakes would mean a big up front investment, storage investment and then hoping I use it all up before it goes bad. So, in this case, it's cheaper to buy the mix than to stock all the ingredients as I would never make this or like things often enough to justify large quantities of most of those ingredients.

Friday, January 18, 2013

I can't keep up with the demand!

I made bread two days ago - three loaves - one whole grain and two white and it's all gone. I made cookies three days ago and they are all gone - and I made a ton.

Seriously, if I want to keep up with the demand, I really need to bake every day and even me, a person who loves to bake, that's hard to keep up with.

Even dinners are tough. I made a HUGE pot of chili two days ago. It lasted two days. Man, I remember when that would last 3 and I would freeze some too! Sigh.... growing boys! Guess I'll be adding some more pictures today of whatever I decide to make tonight.

Thursday, January 17, 2013

Let me tell you about yeast

Yeast is yeast, right? I used to think so. And then I started to get confused. What is bread machine yeast? What is active dry? Rapid rise? Instant? Traditional? And why does one of my bread books say, "If you are using the newer yeasts, cut the rising time in half." There's newer yeast? Oh, and yes, there is cake yeast or compressed yeast that you can buy in cubes in some stores and you can make your own "wild caught" yeast too. To make it even more confusing there's nutritional yeast and brewers yeast. There's probably more too - I'm just still ignorant about it.

So, yeasts.

Most of us who dabble at making breads once in awhile usually buy yeast like this:


Or this:


This is the most expensive way to buy yeast, but if you don't bake with yeast often, it's probably the simplest and easiest way to go. Yeasts do go bad. Or better put, it will eventually die. So, if you don't make breads often, don't buy much.

You can still buy it in bulk in some stores though. Our local Whole Foods used to carry baker's active dry yeast in bulk bins. That way I could get as little or as much as I wanted for about 75% less. However, they no longer carry it. A local organic store here carries yeast in bulk for much cheaper too (as I hear some big box clubs do to), but in a big vacuum sealed bags like this:


But, notice all the different names: Active dry yeast. Traditional active dry yeast. Rapid Rise yeast and then fresh active yeast (seen below):


I picked all Fleischmann's for photos because I wanted to show that it's the same company that is using all these different names too. Fleischmann's is not the only company making/packaging yeasts. You'll also see Red Star too and perhaps a couple others.

But how do they differ?

Well, Fresh Active yeast/compressed yeast/cake yeast is just that - fresh and active. They have a very short shelf life and need to be kept refrigerated. Some older recipes will specify this type of yeast, but you can use other yeast in it's place (see conversion info below).

Active dry yeast many times needs to be proofed (as their granules are bigger and don't dissolve as well into the dough without proofing) and it most often requires two risings of the dough.

Instant/Rapid/Bread Machine yeast are all the same yeasts and they do not need to be proofed, only require one rising and are well, faster!

Here is a great description from this site that talks all about yeasts and how to use them and interchange them: http://www.breadworld.com/faq.aspx

Frequently Asked Questions


How much dry yeast is in 1/4 ounce envelope? 
About 2 1/4 teaspoons. 

How should I store yeast? 
Store unopened yeast in a cool, dry place, such as a pantry (or refrigerator). Exposure to oxygen, heat or humidity decreases the activity of the yeast. After opening, store in an airtight container in the back of the refrigerator, away from drafts. Use within 3 to 4 months; freezing not recommended. 

Can I use expired yeast in my recipe? 
For best results, buy and use yeast before the expiration date. Yeast loses its potency as it ages, resulting in longer rising times. Proof yeast to determine whether it is still active. 

How do I proof yeast to test for activity? 
To proof yeast, add 1 teaspoon sugar to 1/4 cup warm water (100° to 110°F). Stir in 1 envelope yeast (2 1/4 teaspoons); let stand 10 minutes. If the yeast foams to the 1/2 cup mark, it is active and you may use it in your recipe. RapidRise™ yeast loses its fast rising capabilities if dissolved in liquid, and will require two complete rises. 

Can RapidRise™ and Bread Machine Yeast be used in Active Dry recipes? 
Yes. Simply follow the One-Rise Method detailed on every package. For best results, add undissolved RapidRise or Bread Machine Yeast to dry ingredients first. Add liquids and fat heated to 120°to 130°F. To use the traditional Two-Rise Method, add sugar to water before stirring in Yeast 

Can Active Dry Yeast be used in RapidRise recipes? 
Yes, but with limitations. The Active Dry has larger granules and it is necessary to dissolve completely for the yeast to work. Therefore, Active Dry works best if dissolved in warm water (100° to 110°F). 

What is the difference between Instant Yeast, Bread Machine Yeast and RapidRise Yeast? 
Mainly names, but these are all the same yeast! Use interchangeably. 

What is the difference between fast-rising yeast (RapidRise/Bread Machine Yeast) and Active Dry Yeast? 
RapidRise and Bread Machine Yeast are different strains than Active Dry Yeast. RapidRise and Bread Machine Yeast are grown with a higher level of nutrients and are dried to lower moisture content. The particle size of RapidRise and Bread Machine Yeast are finely granulated to allow complete hydration of the yeast cells during the mixing process. The Active Dry Yeast larger particle size should be dissolved in water to achieve complete hydration prior to adding to the mixer. In addition, RapidRise and Bread Machine Yeast contain ascorbic acid resulting in increased loaf volumes. 

How do I use Fresh Active Yeast? 
Fresh Active Yeast is the product that Fleischmann's has been manufacturing for over 130 years. It is also traditionally known as compressed or cake yeast. It has not undergone the drying process, so it does not need to be dissolved before use: soften the cake in warm water first OR simply crumble the yeast into dry ingredients (if directed by recipe). Fresh yeast requires two rises. Yeast is available in two different sizes: 0.6 ounces and 2 ounce household cakes 

How do I substitute dry yeast for Fresh Active Yeast? 
One .6 ounce cake is equivalent to 1 envelope of dry yeast. One 2-ounce cake is equivalent to three envelopes of dry yeast. Follow the directions on the package recommended for the type of yeast you substitute. 

Can Active Dry Yeast be used in bread machines? 
Bread Machine Yeast is specially formulated for bread machines and recommended by most bread machine manufactures. It is finely granulated to hydrate easily when combined with the flour. Ascorbic acid (vitamin C) is added to promote good loaf volume and structure. Active Dry Yeast may be used but may not yield optimal results. 

_____________________________________

What this doesn't go into detail about is how these differing types of baker's yeast affect the flavor of the bread. Maybe most people don't notice the difference, but if you experiment a bit, you learn that doughs that rise for longer, ferment a bit, have a better flavor. Well, if we really, really think about it, what's most people favorite breads? Sourdoughs and other artisan breads and that's because the yeasts have had time to change the dough to help it  develop more flavor. 


If you really get into baking breads and you will see all sorts of new terms - preferments, poolish, bigas, etc. All of them are basically yeasted starters that add more life and flavor to your bread. This extra long preparation of breads is what makes artisan breads so wonderfully tasty and pricey. They take longer because of letting the yeast develop longer. Want to know more? Check out King Arthur's great description of preferments: http://www.kingarthurflour.com/professional/preferments.html.


What does this mean for you and me? People who want to get into baking to make it cheaper or to make it healthier or both? Well, for me, an amateur baker, it means that I don't buy instant, rapid rise or bread machine yeast. It doesn't develop enough flavor in the dough as it just rises too fast to give the dough some definition.  I use active dry yeast, or traditional yeast. I also stay away from the cake/compressed yeast just because it's expensive and it is short-lived.  Since I bake a lot, I buy the vacuum sealed 1 lb. bag of active dry yeast. I store it in an air tight container in my pantry. I don't refrigerate as I will go through it fast enough.


If it's bulk, how can you be sure which is which if it's not labeled well or it's a newer label that you haven't seen before? Well, they look different too. Active dry yeast are tiny beads. They look like this: 


Instant or bread machine yeast will look like this:


So basically, if you see they are almost a powder, or very small pellets, it's probably a form of instant.  If they are bigger pellets or are round, it's active dry yeast.


As far as preferments go for developing flavor even further I do sometimes make preferments, but so far I haven't dabbled beyond any preferments that takes longer than 2-3 hours. Maybe someday I'll get really into bread baking, but for now, this is fine and my family is satisfied.


Last thing I will mention is absolutely do not buy brewer's yeast or nutritional yeast for baking.  These are nutritional supplements. Brewer's Yeast is used for medicinal purposes and for forms of Vitamin B. Nutritional yeast is also for complex B Vitamins as well as being a complete protein to be used in vegetarian and vegan diets. Neither of these yeasts are active, so therefore your bread would never rise/grow if you tried to use these instead of baker's yeast.


Never knew there was so much to it, did ya?

Wednesday, January 16, 2013

An easy peasy white bread anyone can make!

This recipe is a modified version of Bernard Clayton's Cuban Bread. I've tweaked it to get the right consistency. I've probably made this particular bread a couple dozen times because it is easy, quick and delicious AND it's cheap! Ways to make it cheaper? DO NOT BUY yeast in packets or those teeny tiny jars. Go to a health store and buy it in bulk (might be in a bulk bin or in a bulk package). You will cut the cost of yeast down by 75%. Just be sure it's not nutritional yeast or brewers yeast, but active dry yeast.

Ingredients:

6 cups bread flour (you can use all-purpose flour too)
2.5 cups hot water (120-130 degrees)
2 packets of yeast OR 5 teaspoons of active yeast (rapid rise)
2 tablespoons granulated sugar
1 tablespoon of salt

That's it - nothing else.

So, how to make it:

First mix 4 cups of the flour, the yeast, sugar and salt. Add the water (don't worry, you will not kill your yeast. Mix that in your mixer (or by hand) for 3 minutes. (Please follow your mixers directions for bread so you don't kill your machine!)  Then add the remaining flour a half cup at a time. Once all the flour in incorporated, mix/knead for 8 minutes. It should look like this:


Cover the bowl with saran wrap (or with a lid). Let that rise from 15 minutes to an hour until it's doubled in volume. How fast it rises will depend on your yeast, the room temperature and just the quirkiness of bread baking. I usually put it in a warm place if I can.

Once it has risen, divide the dough into two equal pieces. Now... here is where it's tricky. Now you are going to form it into a ball and create tension. I have a granite counter top so I rarely need to add flour to the surface - try to avoid adding flour to breads when you shape them (if you can help it) as that can dry it out. Here's a great tutorial on how to shape this loaf, called a boule: https://www.youtube.com/watch?v=pmTPL2J8OZk  You don't want to sprinkle flour on yours once it's shaped though as yours is not going to proof in a basket.

Next step. Scoring the bread. On a loaf of bread that has been rising, this is tricky. On a loaf that you have just shaped? easy peasy! Take a serrated sharp knife and create some  deep slashes (Don't cut all the way through or halfway through, but do cut it). It will start to immediate open. That's good. When it bakes, it will spring up in there and will leave your loaf with a nice artisanal look. Here is a video on various slashes. it shows how deep: https://www.youtube.com/watch?v=iYl5mCqY_L8. I do just three or four slashes on my bread - either three parallel lines or three or four near the center radiating out (see loaves below).

Scoring and slashing are not just for looks though. A good slash will prevent your loaf from doing something like this (this loaf was in a pan, but without slashing, it can happen to ANY bread). A bread will expand at the point of least resistance. You want it to be through your slashes. Not the side of the loaf like a hernia.


Get a cup of HOT water (boiling would be fine, but not necessary) and put it on a spare cookie sheet (with a rim) in the bottom of your oven if your elements are covered or the lowest rack if your elements are exposed. This will provide steam for your bread so it will form that artisan crust. I have some old yucky cookie sheets that I have kept just for that. You want it to be a large pan so that the water has a chance to boil and evaporate - a pizza pan (with sides) would work well too. Do you NEED to add water to the oven? No. You will still get a nice loaf, just not as nice of a crust on it.

Now, the super, duper easy part about this bread and what makes it so fast is that your dough is now ready to go in the oven. You read that right. Do not let it rise after shaping and scoring.  It does the final rise in the cold oven while heating up. Place that firm boule where you've created that great tension on a cookie sheet with either silicone mats, parchment paper or sprayed with baking release spray. You can put both boules on the one cookie sheet. Place the cookie sheet with the bread in the middle of the cold oven. Make sure there's nothing above it so that your bread can rise! Now turn on your oven to 400 degrees

DO NOT OPEN THE OVEN while baking especially at the beginning or you'll release the steam from the oven. Bake until the internal temperature is around 205-210 degrees or until the bread sounds hollow when tapped on the bottom. That bakes, for me in about 45 minutes.

When it's done. It might look like this: 


I will say though that it looks different every time. This particular loaf was baked in a traditional oven. Sometimes I bake it in the convection oven (I have double ovens - one is convection, one is not).

When I bake it in the convection oven, it doesn't get the same kind of crust (as the steam gets blown out of the oven.  It might look like this, instead: Note the lack of sheen?


I will also state that sometimes it doesn't grow all nice and pretty - loaves are unpredictable, but they will taste the same!

There you go. An easy, beginners loaf that is simple, inexpensive and FAST.

Thursday, August 30, 2012

The best Moussaka!

I don't know why it's so hard for me to keep this blog up to date. I cook and bake all. the. freaking. time. However, I also do another blog (which takes priority) and I write blog posts for a part-time job. My creative juices get sapped I think!

Anyway, the other day, I made the most fabulous moussaka. It was so good, my mother in law didn't say a word about it once she took a bite. She did when I was making it, "Oh, you aren't using bread crumbs. You make yours different." When she ate it though she was quiet. Normally? She would say, "This is OK, but..." or "The best moussaka I've ever had was..." or "This isn't like Maka (her grandmother) used to make."

If she's quiet, she loves it but doesn't want to say it - especially if it's something she has made in the past and I can make better. Which, is most things. And I'm not trying to be all snooty, but... If a person doesn't like to cook and doesn't cook often, they are not going to be a good cook. You have to love to create in the kitchen to make food sing. Also remember in the nearly 3 years we've lived together, she's made ONE meal in that entire time. ONE... and that was 2.5 years ago. She simply hates to cook.

So, back to the moussaka. I learned of moussaka from my husband who made it for me when we were dating. He used his mother's recipe. It is one of the few things he ever cooked for me. I think I can list on one hand what he has cooked for me in the 19.5 years we've been dating/married - Ramen noodles with tofu, scrambled eggs, an omelette, crepes, and moussaka and all of that hasn't been in the last 15 years. Probably not in the last 18 years.

The recipe he used, my mother in law uses and the one I have made myself is this:

1 lbs. ground beef
1 large eggplant, skinned and sliced length-wise, 1/4 inch thick.
2 eggs
2 cups sour cream
flour for dredging
2 eggs for dredging
bread crumbs for dredging
cooking oil
salt to taste

In that recipe, you would peel the eggplant, slice it, sprinkle it with salt and then let it sit for 15-20 minutes to get the bitterness out of the eggplant. Rinse off the eggplant, pat it dry and then dredge it in flour, then in the beaten eggs, and then in the bread crumbs and then fry in cooking oil. Drain the cooked eggplants on paper towels.

Cook the ground beef and drain. Layer the eggplants with the meat. Combine the two eggs with the sour cream, salt, and then pour over the top of the eggplants. Bake in an oven for 30 minutes at 350.

That's it. It's "OK", but it doesn't sing. Plain hamburger? That's flavorless!

So, after a couple times of making it, I added onion to the hamburger when cooking and that helped a lot, but it still wasn't great.

Over time, I had different moussakas at restaurants, usually Greek restaurants. They were so flavorful and so much more substantial. I realized that the recipe I had was just blah, so I rarely made it.

Well, the other day I was out and saw eggplants were on sale. I got the idea to make moussaka. I came home and looked up a bunch of recipes in Croatian/Bosnian cookbooks I have and at recipes online. I didn't want to totally switch things up to make it a Greek moussaka versus a Bosnian/Croatian moussaka, but I knew I needed a better recipe or ideas.

In the end, I combined several recipes and added some more of my own ideas - keeping some of the traditional way of making moussaka in Croatia.

The new recipe is as follows:

2 lbs of ground lamb
2 medium yellow onions, finely chopped
2 cloves garlic, minced
1/2 teaspoon cinnamon
1/2 teaspoon ground nutmeg
1/2 teaspoon white or black pepper
1 teaspoon sweet Hungarian paprika
3 large eggplants, sliced length-wise in 1/4 inch thick slices
Eggs for dredging (I used 8)
Flour for dredging
Light Olive Oil for frying
4 eggs
1 large container of sour cream (about 4 cups)
Salt to taste

I started with washing and trimming the eggplants. I left the skins on (they give a nice flavor). I got my large roasting pan 16x20. I sliced the eggplants in 1/4 inch slices and salted them, layering them in the pan. I let this sit for 20 minutes. I then rinsed off the salt and patted the eggplants dry.

I then dredged the eggplants in flour with a bit of salt, then dredged them in the beaten eggs. I fried the eggplants on medium heat until they were soft and the crust was golden. I drained them on paper towels.

I then browned the meat with the chopped onions. When the onions were translucent, I added the garlic and cooked a few more minutes. I then added the spices and stirred them in. You might be thinking cinnamon and nutmeg? Yep... it goes great with lamb... DON'T add those if you are cooking with ground beef! (but you can add more Hungarian paprika and keep the pepper if you opt for beef - but seriously, use lamb - it's more traditional and adds so much more flavor and a better texture.)

In a mixing bowl, I combined the sour cream and eggs and a bit of salt.

I took my large roasting pan and greased it with a bit of olive oil. I covered the bottom of the pan with the first layer of eggplants. Then added a meat layer. I repeated this. When I had half the layers done, I added 1/3 of the sour cream mixture over the layer. I added 2 more eggplant and meat layers, ending with a layer of eggplants. I then topped the dish with the remaining sour cream mixture - making sure to spread the mixture across the entire top.

I baked it for 40 minutes at 350. It should be bubbling and the top slightly golden. Serve with a tomato salad.

And wow... it cut nice. It was smooth. It was good! It was so good my husband said, "You can make this for me for my birthday (which isn't until January!). I would call that a huge success.

This makes a really big pan of it. So, you can halve the recipe easily. I just make a big pan as it freezes so well. We ate it that night (four adults) and then I froze 2 more full meals and there was still enough for lunch for 2 the next day.

Is it low fat? No way. Is it low carb? Not too bad actually. Is it yummy? One of my favorites.  As I was eating it, I was thinking to myself, "This is as good as I would get in any restaurant." And I think that's true. I finally found the recipe!

I didn't think to take pictures of the process. I took a couple after we ate as I realized, "I need to write this down as I'm making this again and I should share it!"